Setting the stage (get your gelato!)
Clive’s Corner by Clive Bagshaw
A feature of MicroNews, Clive’s Corner is a place created for the sharing of knowledge, tricks, and tools. The Corner is where you read about clever microscopical hacks - and submit your own. Clive’s Corner is the namesake of SFMS Member Clive Bagshaw, who has spent a lifetime looking into microscopes - including 50 years studying protein reactions.
In this Corner: This is installment #3 of Clive’s Corner, in which Clive describes how gelato can improve your microscopy. It’s another hack that beginners can explore on inexpensive microscopes, and this one is especially delicious.
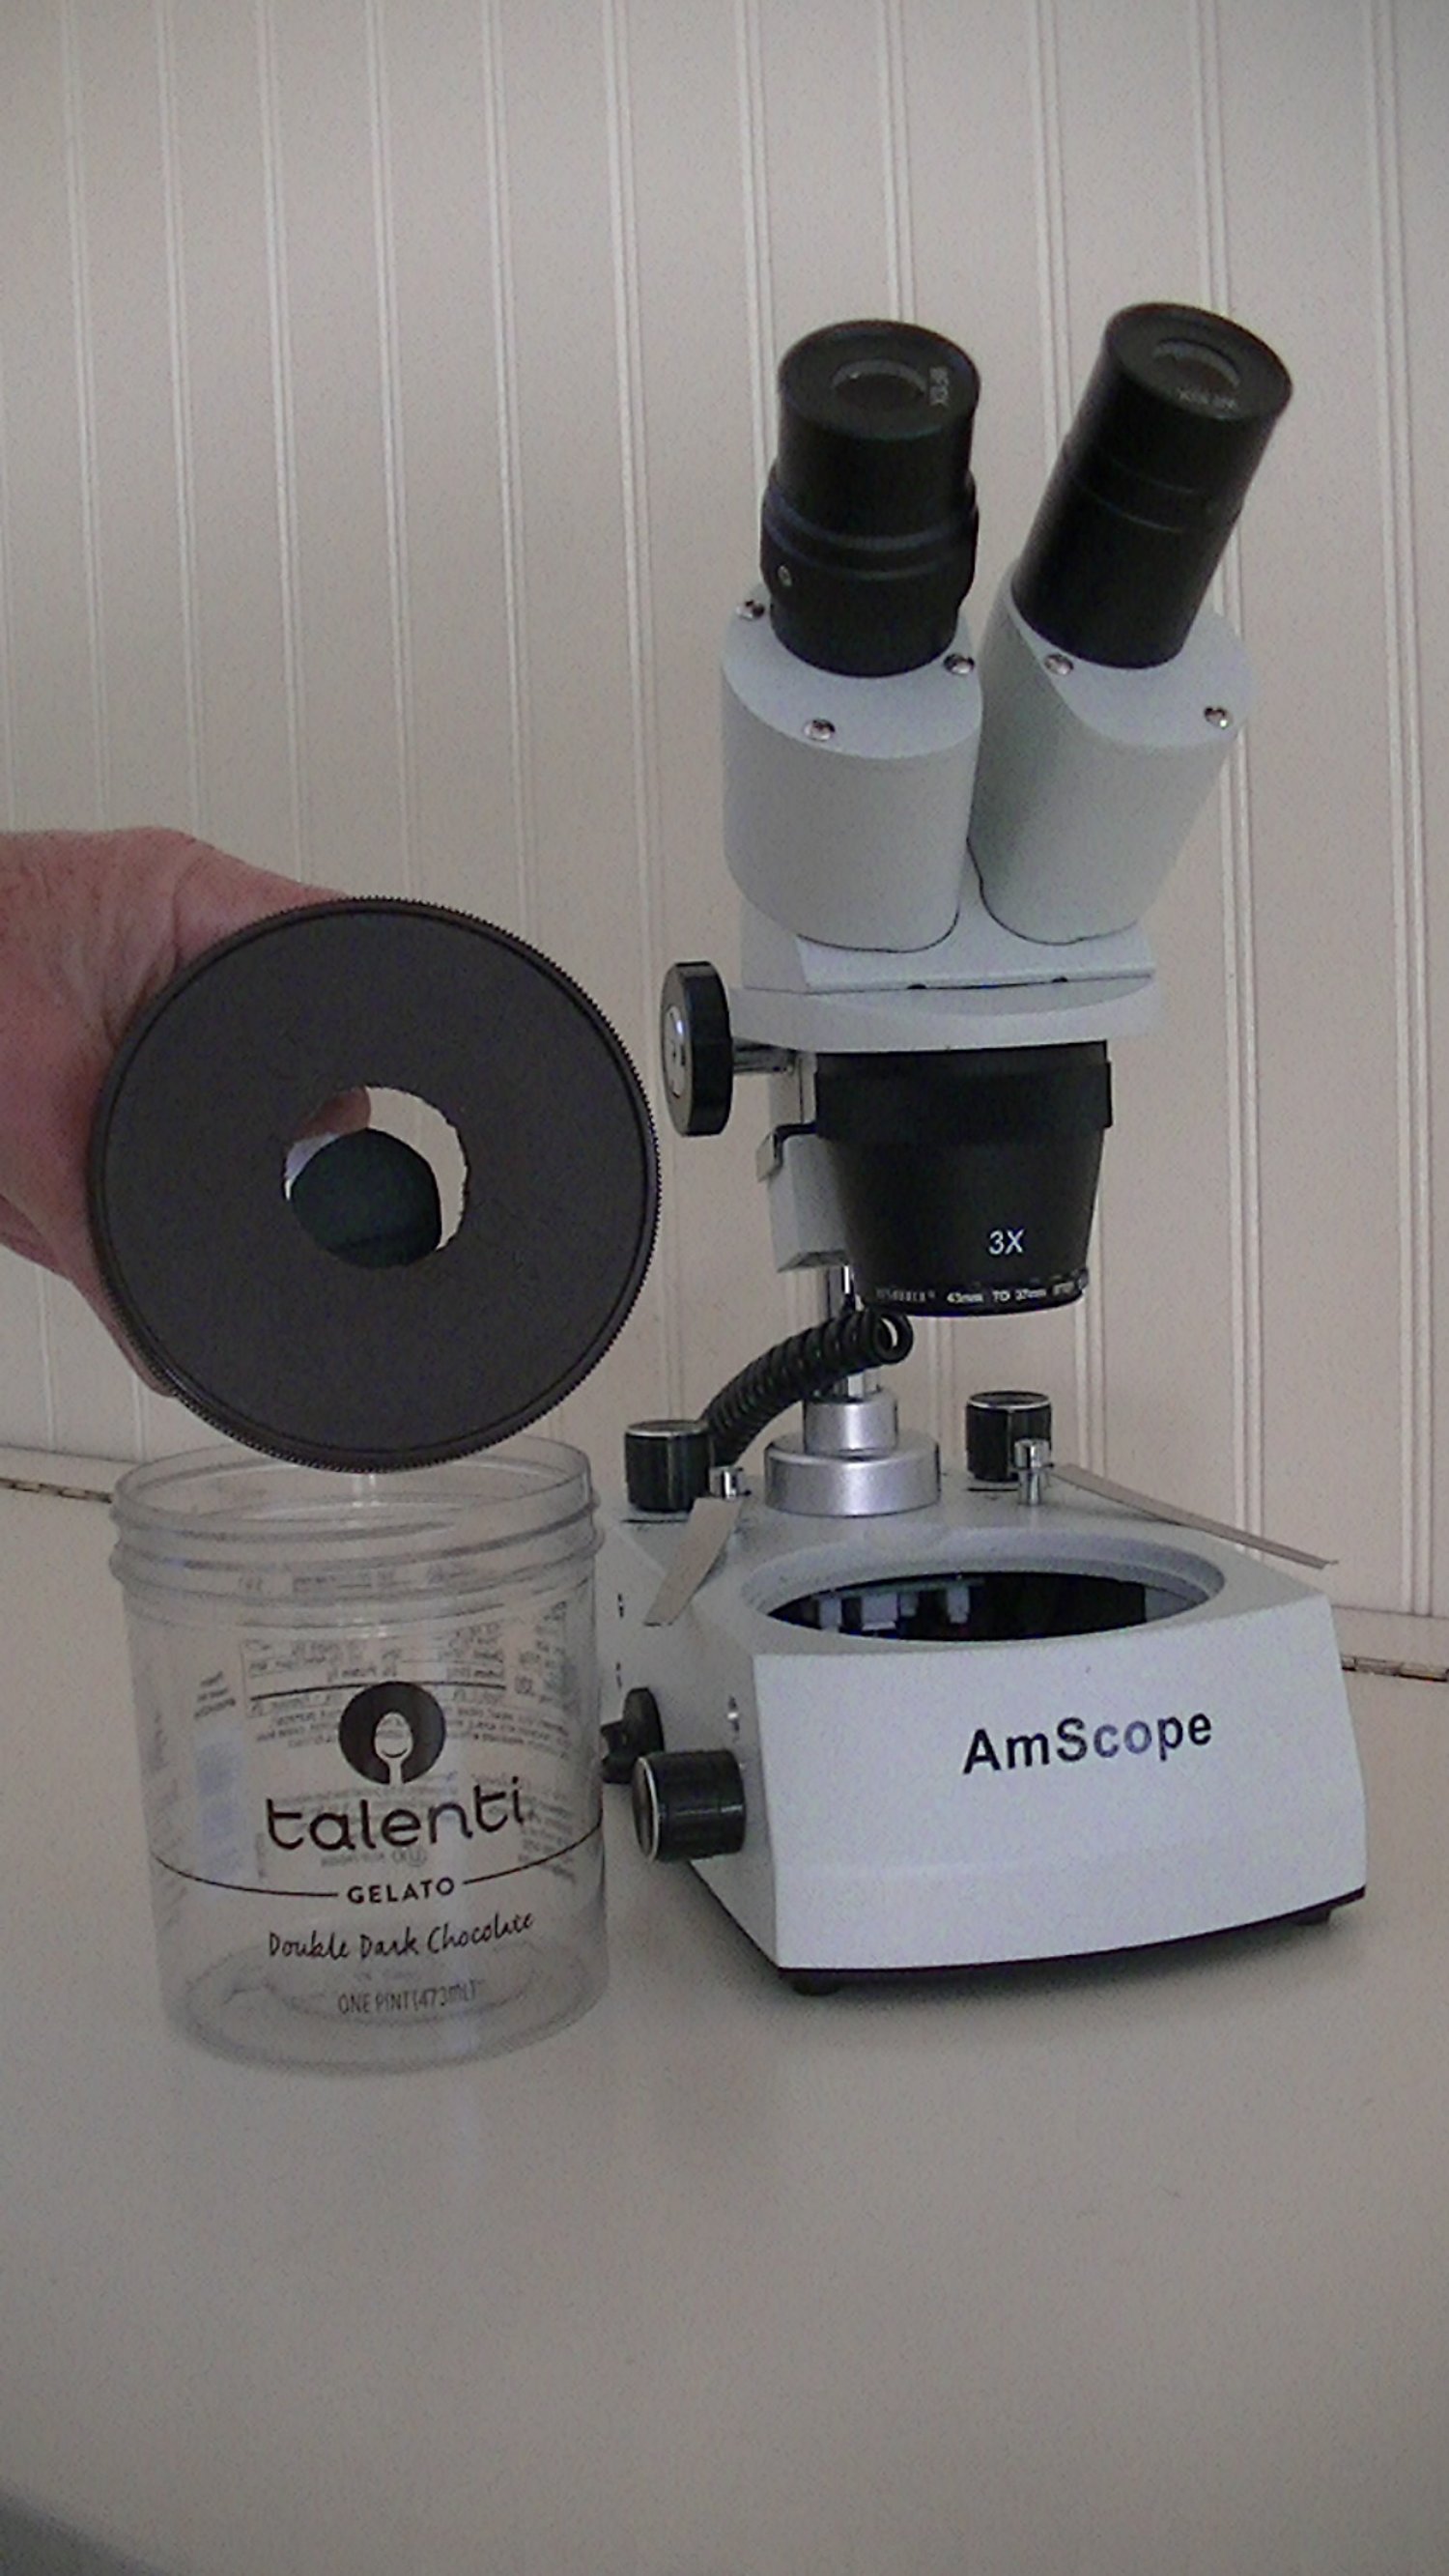
Double Dark Chocolate lid as a darkfield condenser.
Talenti gelato jars are almost as famous as the ice cream itself and have a plethora of webpages devoted to their reuse, mainly as storage containers. Nonetheless, I haven’t found reference to the fact that the lids are 95 mm in diameter and are a perfect match for the stage plates found on many stereo microscopes. For those stereo microscopes with an under-stage light source, this plate is normally made of frosted glass which provides an even, diffuse background illumination. However, with low power objectives having a relatively large depth-of-field, there is sometimes a problem when viewing objects close to the stage plate because the background appears mottled and interferes with the object itself. This can be overcome by using a Talenti lid as a spacer. Simply drill and ream out a hole a little larger than the field-of-view of the objective in the center of the lid and place on the stage. Then rest the Petri dish or slide holding the sample just above the hole. The additional 15 mm spacing should throw any mottling from the stage plate completely out of focus.
But don’t stop there, as you are now one third the way through to making a darkfield condenser for your stereo ‘scope. Now you have to find an empty soda can with a shiny inside and a roll of black electrical tape. Cut a length from the can to fit inside the Talenti lid that extends about halfway down to the light source (Figure 1a). Attach this soda can tube to the underside of the lid using electrical tape. The final step is to add a darkfield patch made from black electrical tape and a transparent piece of plastic that fits on the other end of the soda can. The exact design will depend on the space available within the microscope housing. The patch stop works in a similar way to the darkfield stop I described for a compound microscope in the last installment of Clive's Corner. The diameter of the patch needs to be a little larger than the hole in the Talenti lid, and the latter hole should match the field-of view. A circular piece of aluminum foil can be glued to the underside of the darkfield stop, to reflect the direct light beam downward (Figure 1b) and the bottom of the soda can be used to gather more light from the microscope LED by cutting it to size and resting it above the light source (Figure 1c). The arrangements in Figures 1a and 1c can be combined by using a smaller diameter soda can on the bottom so that it fits inside the upper can attached to the lid. Whichever way, the patch stop needs to be about halfway between the light source and sample. These adaptations are described in this YouTube video, which also includes the procedure for darkfield modification on a compound microscope.

Figure 1a. Schematic of the darkfield stop arrangement. A 12 mm hole and 13 mm diameter stop works for the 3x objective on my Amscope 350 stereo scope.

Figure 1b. An upside-down view of the condenser, showing aluminum foil attached to the darkfield stop which in turn is taped to the soda can and Talenti lid.
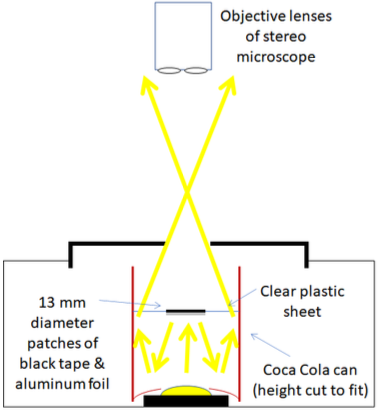
Figure 1c. A alternative arrangement with the soda can reflector resting just above the LED light source, and a reflector attached on the underside of the darkfield stop.

Figure 1d. Additional peripheral lighting can be added using a ring of LEDs (Angel Eyes).
In a darkened room with the LED set on maximum brightness you should see any transparent objects shining brightly against a dark background (See Figures 2a and 2b). But there is a bonus when using a stereo scope in that the darkfield image has a greater depth-of-field and objects appear 3-dimensional. Observing plankton swimming around in a Petri dish looks like a galaxy of shooting stars. Now here is the best bit. You need to make a darkfield condenser with a different hole and stop diameter for each magnification setting, so you get to sample more Talenti gelato.

Figure 2a. Brightfield image of pond sludge: 30x magnification.

Figure 2b. Darkfield image of pond sludge: 30x magnification.
If you find the illumination is not quite bright enough for your purposes, you can supplement the light source with a ring of LEDs (Figure 1d). These are available on-line under the name “Angel Eyes” in various diameters. The 40 to 50 mm versions should be suitable in most cases. These LEDS require 12 volts and are readily powered by an external supply. Choose a diameter of Angel Eyes that sit around the built-in LED and also are a little larger than the diameter of the objective housing. That will allow the same ring of LEDS to be used for illumination of the sample from above in reflected light microscopy. As the light comes from all directions you get more even illumination of the object, than provided by the built-in top illumination source. Tape can be used to temporarily hold the ring light around the objective turret, but a more robust solution is to find a compatible screw thread, such as from an old camera filter (more on this later).