Starch Gelatinization Under the Microscope
By Taylor Bell, Oakland, CA
Starch is all around us. Both plants and humans use starch for energy. Plants create starch, and we use it in its refined or unrefined forms for many culinary purposes. We eat plant seeds and roots largely for their starches and we grind them to make starch-rich flours. Without starch there would be no pastries! As a culinary professional, it is helpful to know how starch acts under various conditions. As such, I sought to replicate culinary conditions under the microscope—I wanted to see what happens when you cook starch! To achieve this, I used the following equipment and materials:
Omax compound microscope
AmScope 20x Plan Achromatic Objective
Lumix G7 camera
AmScope D-SLR camera adapter for Canon cameras
Fotasy Canon to Lumix lens adapter
Generic hairdryer
Starch is a molecular chain of sugars, a polysaccharide. Plants construct these chains with sugars created by their photosynthesis and then wrap them into granules for later consumption. It is these granules that we will investigate. The starches that we buy at the store (corn starch, potato starch, tapioca flour, arrowroot) are all extracted starch granules. When heated in the presence of water, these granules become unstable and absorb large quantities of the surrounding water. Bloated and misshapen as they become, they increase the viscosity of the mixture by inhibiting one another whenever they try to move past one another when agitated. From a macroscopic vantage point, depending on the ratio of starch to water, this mixture is a gel. Starch’s ability to gelatinize is used extensively in cooking: in breads, where, as a major component of flour, it forms its tender structure, and in puddings, where it imparts a creamy texture and loose structure.
Starch Gelatinization
Starches gelatinize over a range of temperatures. Potato starch, for instance, has a gelatinization range of 58-65ºC/136-150ºF. This means that a mixture of starch and water will generally begin gelatinizing around 58ºC/136ºF and continue to gelatinize and thicken the bulk mixture as the temperature increases. Why, though, is starch gelatinization a range rather than a single point? With the help of a microscope and a heat source, we have the opportunity to discover the answer.
Slide Preparation
To extract starch from a halved russet potato, I made about twenty shallow incisions. I then positioned the incised potato over a microscope slide set on a table, angled much like one might orient a slice of citrus to squeeze into a drink, and compressed it until a drop of potato fluid fell on the glass. I next held a coverslip 90º to the slide and let it make contact first with the glass and then moved it until it touched the potato fluid. Once the fluid adhered to the edge of the coverslip, I slowly lowered the opposite edge of the coverslip and let it drop at around 45º to the slide reduce the chances of trapping air. To properly fill out the slide with liquid, I used a pipette and small vessel of water to add a few small drops at the edge of the coverslip until fluid filled the intervening space, edge to edge. I then sealed each side of the coverslip with nail polish to prevent water from evaporating. This slide-preparation technique can be used for making unstained slides of starch from several possible sources of starch found in your kitchen such as cornstarch, whole wheat, yams, sweet potatoes, and rice.
Iodine-Stained Starch Slide Preparation
I squeezed several drops of potato juice into a small dish and added several drops of a 10% povidone-iodine solution, purchased at my local pharmacy, along with about 5 mL , or a teaspoon of water. I let this sit for 1 hour and then tilted the dish to allow the now-blue starch granules to settle into a heap easily accessible by pipette. In the presence of iodine, starches turn a deep blue. Iodine is also used in agriculture to determine the ripeness of fruit: unripen fruit has not yet converted its abundant starches to sugars, thus a cross-section sprayed with an iodine solution turns a dark blue. After collecting some with my pipette, I dropped one drop on a slide and sealed it with a coverslip as I’d sealed the previous slide.
Imaging Setup
With the slides prepared, I loaded the unstained starch slide onto the stage of my microscope and found focus. I located granules that weren’t on top of one another. Starch granules that are not crowded have access to enough water to fully gelatinize. When crowded, the starches tend to shift dramatically as they gelatinize and starch granules that were of interest may be forced out of the field of view. With my field of view established, I next considered what imaging and video techniques to use.
Imaging Techniques
Starch granules are transparent under the microscope, and so can benefit from techniques that add information to the final image or video. I employed three techniques when capturing my images and videos, sometimes combining techniques to achieve a desired visual or informational effect. First, iodine staining provides contrast or reveals the presence of starch as in this unripe apple slice. (See image.)

Ripe (left) versus unripe apple
Staining is utilized to help locate a desired feature in a sample. Iodine is particularly useful in helping the viewer distinguish starch granules from vacuoles and other cellular components. In my case, however, I’d already separated the starch granules from the potato cells and there was nothing else there with which to confuse them. The iodine stain improves the contrast of both uncooked and swollen starch. This is particularly helpful with the latter because as the starch absorbs more and more water, its refractive index shifts closer and closer to that of water, increasing its transparency.

Cooked, iodine-stained potato starch granules
A second technique is to use cross-polarized light.
To polarize light, one only needs one polarizing filter, but to employ cross-polarized light, one requires two filters. When used in microscopy, one filter is termed the “polarizer” and the other the “analyzer”. The polarizer is placed somewhere between the light source and the specimen and only allows light that is polarized in one direction to pass through (that direction changes as you turn the filter). The analyzer is placed somewhere between the sample and the oculars or camera and is rotated such that it blocks all of the uninterrupted light from the polarizer (90º to the polarizer). With the filters crossed like this and no sample on the microscope, the view through the oculars or camera is black. When a sample is introduced that also polarizes the light, that light can pass through the analyzer and create an image.
To achieve this with my microscope, I removed the binocular head and cut a plastic polarizing filter to fit in the opening and obstruct the light path—this serves as my analyzer. I then cut another piece that fit over my light source—this serves as my polarizer. Typically, the analyzer is rotated to block more or less of the polarizer’s light, but in my case, that filter is not easily accessible, so I turn the filter sitting on my illuminator. At 90º to one another, the background of the image is black—this is known as extinction. At 180º to one another, the same-direction polarized light can pass through both filters and the background is white. At 45º, the background is somewhere between extinction and white and appears dark.
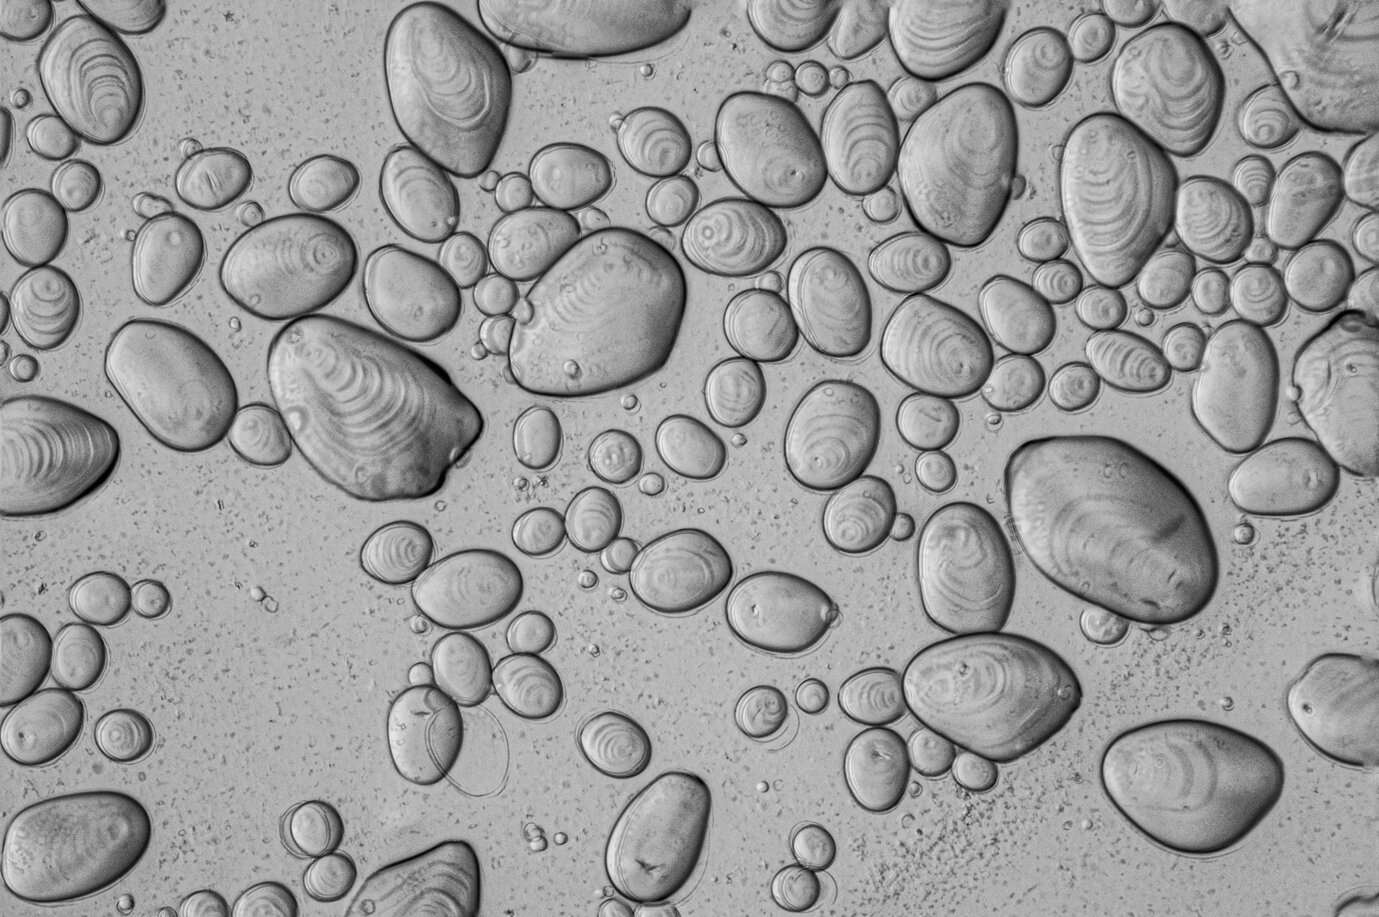
Starch granules are crystalline in nature (though not crystals in totality) and like other optically-anisotropic materials, they exhibit birefringence when illuminated with polarized light. As starch grains absorb water, however, their partially-crystalline structure is compromised and they lose that birefringence. Under the microscope, this birefringence creates a colorful cross (often called a Maltese cross) within the starch granule.
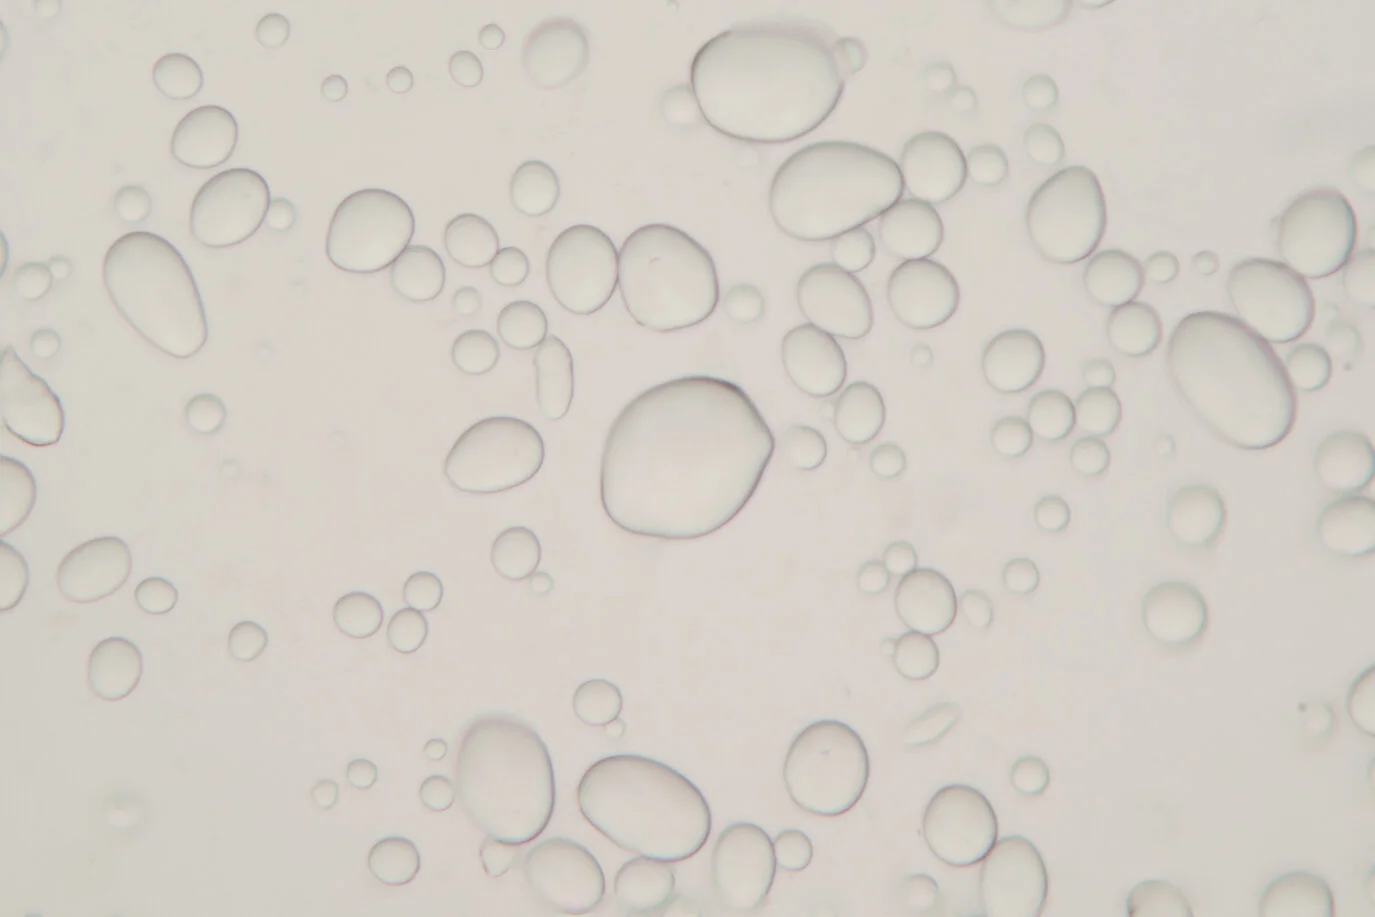
Potato starch granules illuminated with unpolarized light, 20x

Potato starch granules illuminated with polarized light, 20x
Contrast Adjustments
Contrast comes at the cost of resolution and vice versa. By letting more light through, one can increase resolution, but at the expense of contrast. By restricting light with the condenser aperture diaphragm, one can increase contrast, but at the expense of resolution. By partially blocking the light source (which is what the condenser aperture diaphragm does, but in a more uniform way) with something opaque such as cardboard, one can also increase contrast on one side of each feature of the specimen while somewhat maintaining the resolution of the opposite side. Improving contrast may allow the observer to see features and characteristics of the specimen that were otherwise invisible or difficult to see, but the ability to distinguish once-discernible features may be lost in the process. Below are two images of the same field of view but with differently-adjusted condenser aperture diaphragms.

Potato starch, 60x, open condenser aperture diaphragm—starch granule looks relatively featureless

Potato starch, 60x, more closed condenser aperture diaphragm—strata become visible
The video below demonstrates the effects adjusting the condenser aperture diaphragm and employing polarization techniques have on the image of potato starch granules.
This video demonstrates the effects adjusting the condenser aperture diaphragm and employing polarization techniques have on the image of potato starch granules.
Z-Stacking
Z-stacking involves capturing multiple images of the same specimen at different depths, or focal planes, and then using software to combine those images into a single, focused image. In a typical image, some parts of the specimen should be in focus, while others will not be. In a z-stacked image, everything can be in focus. Below is a video that demonstrates the range of focuses of the given sample:
Any one image from the range of focus demonstrated in the video above would produce an image like this one where some planes are in focus while others are not:

However, if you can combine the images into one image and in the process are able to keep the in-focus portions of each image while excluding the out-of-focus areas, you get an image like this:

“Cooking” Starch on a Microscope
To heat the sample and simulate cooking, I used a hair dryer. My hair dryer achieves temperatures just exceeding 79ºC/175ºF about 1 cm from the outlet, which is well past the 58-65ºC/136-150ºF range of potato starch gelatinization. Aimed at the slide and turned to its highest setting, I was able to induce gelatinization in russet-potato starch granules in only a few minutes. This first video is a demonstration of iodine-stained potato starch gelatinizing:
Iodine-stained potato starch heated to gelatinization, 20x
The second video includes the gelatinization of two samples. In the second part of the video, featuring Sample 2, at around 28 seconds in, you can see the contrast improving. As mentioned before, when starch absorbs water, it becomes more transparent, so by closing the condenser aperture diaphragm more, one can see more of the contours of the gelatinized starch.
Potato starch heated to gelatinization, analyzer set to ~45º to polarizer, 20x
To answer why starch has a range for gelatinization rather than a gelatinization point, reexamine the videos above. As the granules begin to swell, you can see that they do so unevenly. Large granules appear to be less stable and take on water first. The smaller granules are more stubborn and take addition time and heat to gelatinize. This is why it is important to thoroughly heat your starch in culinary preparations—failure to fully gelatinize the starch will result in a powdery mouthfeel.
Bonus Images

Z-Stacked, iodine-stained potato starch heated and then cooled, illuminated with polarized light, 4x
Z-Stacked unheated potato starch granules, 20x
What’s Next?
For this article, I explored the heating of starch granules in water. This most closely mimics the thickening of a sauce using a starch such as cornstarch. To more closely approximate something like bread, it would be better to use wheat flour. To make it even more interesting, one could heat bread dough in hopes of approximating what happens inside dough as it transitions to being bread in the oven. On the other end of bread’s life is the staling process. As bread ages, its starches begin to recrystallize, this process makes the bread more stable and thus less tender. Crystallized starches exhibit birefringence when viewed through cross-polarized light and thus are colorful. A time-lapse video of starch staling could thus be a colorful experience! I am currently working on capturing this process and hope to have images and video soon.
If anyone has any questions, please feel free to write me: gustometry@gmail.com