
Clive’s Corner #18: Focus Stacking
One of the challenges of microscopy is dealing with the limited depth-of-field of the objective lens, which may limit the sharpness of the image in the vertical (z) direction to a few micrometers or less. Consequently, high power objectives usually require thin samples to obtain satisfactory images. Early microscopists had little choice other than to close the aperture of the condenser lens to maximize the depth-of-field, but this came with the cost of limiting the resolution in the sample plane (x-y direction). These days, we can have our cake and eat it too by focus stacking. Here two or more digital images taken at different foci are combined in a computer to give an extended depth-of-field. Focus stacking is widely used in macrophotography of opaque samples where the object is illuminated on the same face as seen by the camera and up to 100 frames may be combined in one stacked image. In many forms of microscopy, the illumination light passes through a translucent sample, which presents an additional challenge. Refractive material above or below the plane of focus can distort the light that passes through the in-focus material, leading to degradation of the image. Nevertheless, image stacking generally can improve the overall image quality of microscope images. So, how many frames need to be stacked? This depends on a number of factors, but typically around 5 to 20 frames are used, but even 2 frames can provide a noticeable improvement (Figure 1).
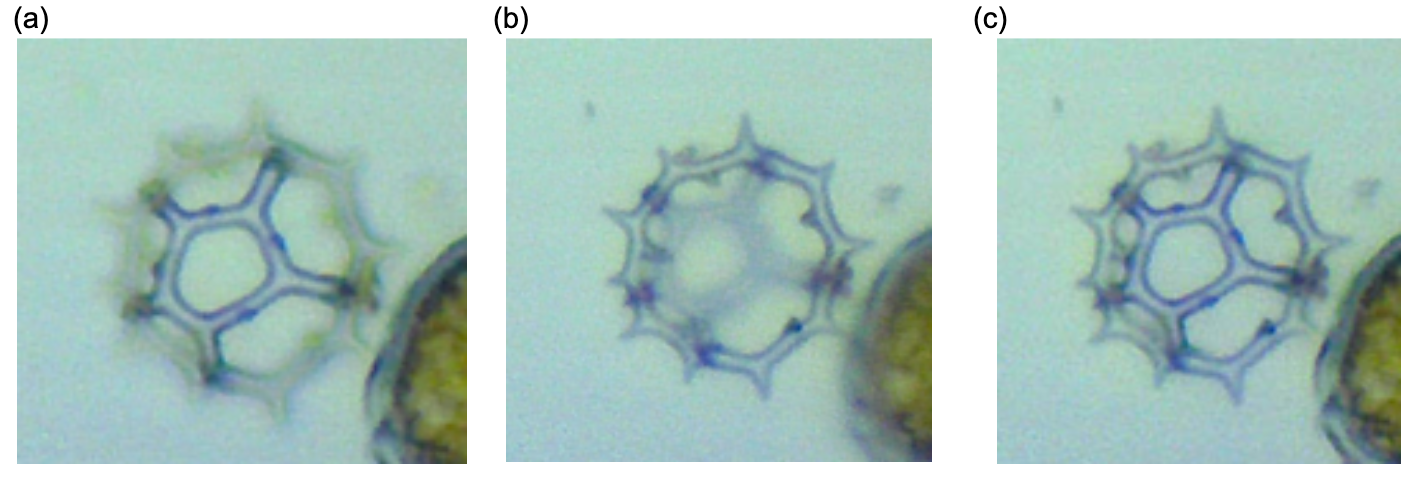
Figure 1. Combining two frames (a, b) of the silicoflagellate, Dictyocha to give a focused-stacked image (c).
There are two steps to the focus stacking procedure i) taking images at multiple points of focus ii) combining the images in a computer to generate the final image. In some cases, these steps can be combined as in the Extended Depth of Field (EDF) option that came with my Amscope USB camera software (Figure 2). When this option is selected and the focus knob is turned slowly, the software automatically collects several images and combines them. While this is a convenient mode to check the effect, it does not work well if there is any movement of the sample during image collection. Many other programs for image stacking allow for prior correction of any translation or rotation of the images.
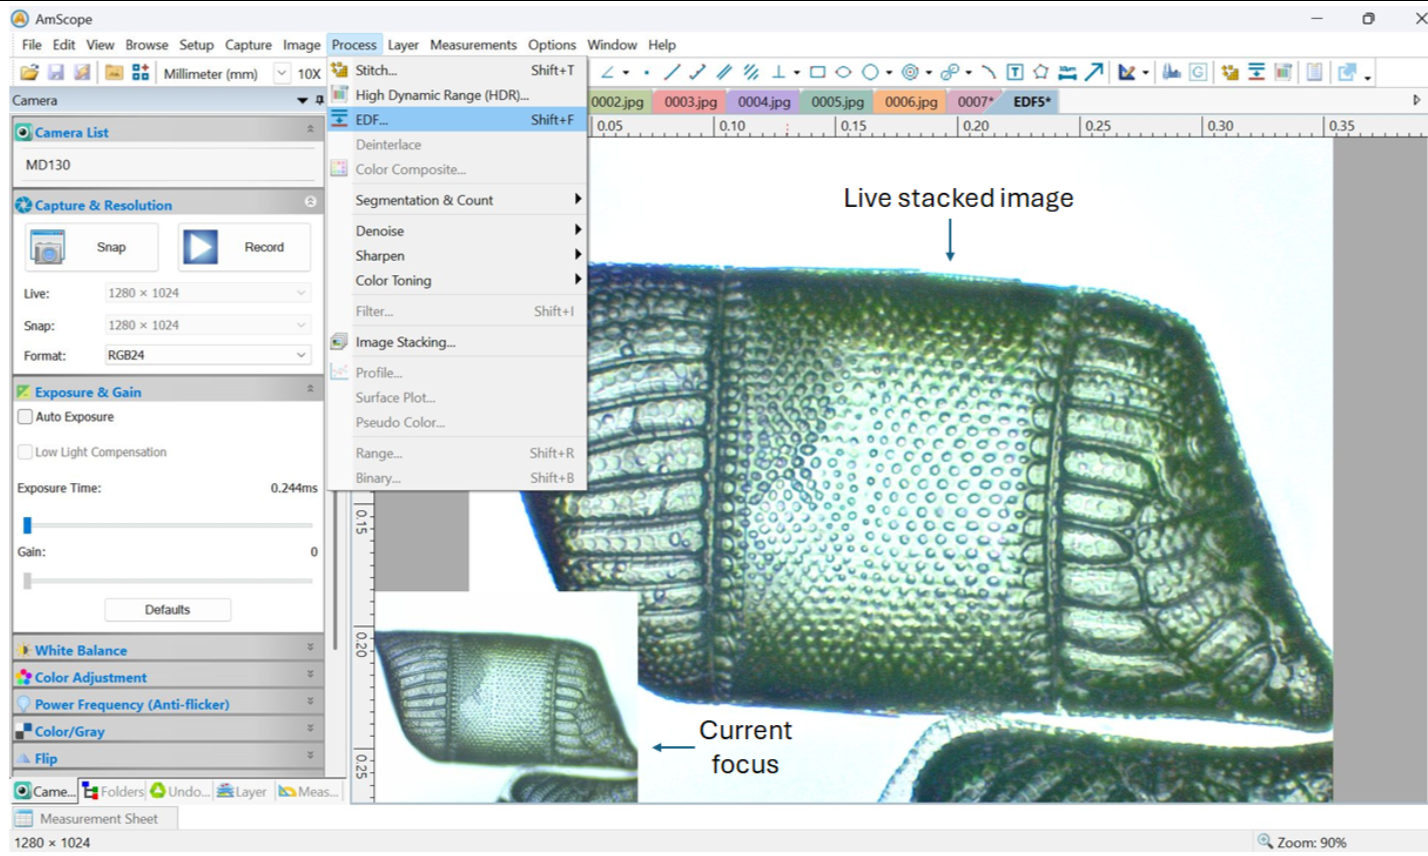
Figure 2. The Extended Depth of Field (EDF) option in the Amscope USB camara software. The main image of the Isthmia diatom is the live focused-stack image which updates as the focus knob is turned, while the small inset shows the current focus position.
How is it best to capture images at multiple positions of focus? This can, of course, be done manually by starting at one extreme position and turning the focus knob in small steps to traverse through the sample. The camera is then manually triggered at each point, but this can lead to jogging the microscope and shifting the sample. A better way is to set the camera to time lapse mode to take pictures every second or so and slowly turning the focus knob. Alternatively, a video can be recorded and then converted to individual frames using, for example, the free VLC software. Finally, a more sophisticated way is to control the microscope focus with a stepper motor which can turn the focus knob by a very small but defined amount.
Controlling the focus with a stepper motor is a bit of an overkill for many purposes but it makes an interesting project for those who like to tinker. The parts and procedures are described in a Makers Guide article. I used a Nema-17 stepper motor that was controlled by an Arduino uno R3 microprocessor via a A4988 driver (Figure 3). The Arduino is a device for sending signals for starting and stopping the motor in a sequence that is predefined in a software program written on a computer. However, the Arduino output is restricted to 5 volts and 20 milliamp signals which is insufficient to power the motor directly, hence the need for a A4988 driver that can handle a 12 volt, 2 amp supply. The shaft of the motor was attached to the microscope via a small nylon bush that was glued to the focus knob and clamped with a grub screw. The Nema stepper motor requires 200 steps to rotate 360o. However, there are ways to program substeps of 1/2,1/4, 1/8 and 1/16, so that the microscope stage could be raised at intervals as low as 1.4 um. The motor was programmed with the desired number of steps and the total distance to be moved, from which it calculated the individual step distance for each train of pulses. In principle, the Arduino board could also send a signal to the camera to take a picture after each step, but a simpler solution was to set the camera in timelapse mode, say 1 picture per second, and send pulse train to the motor every second. Activating the camera about 0.5 seconds after starting the motor proved sufficient to keep the two events out-of-phase for the entire collection period. The operation can be seen in action in a YouTube video.
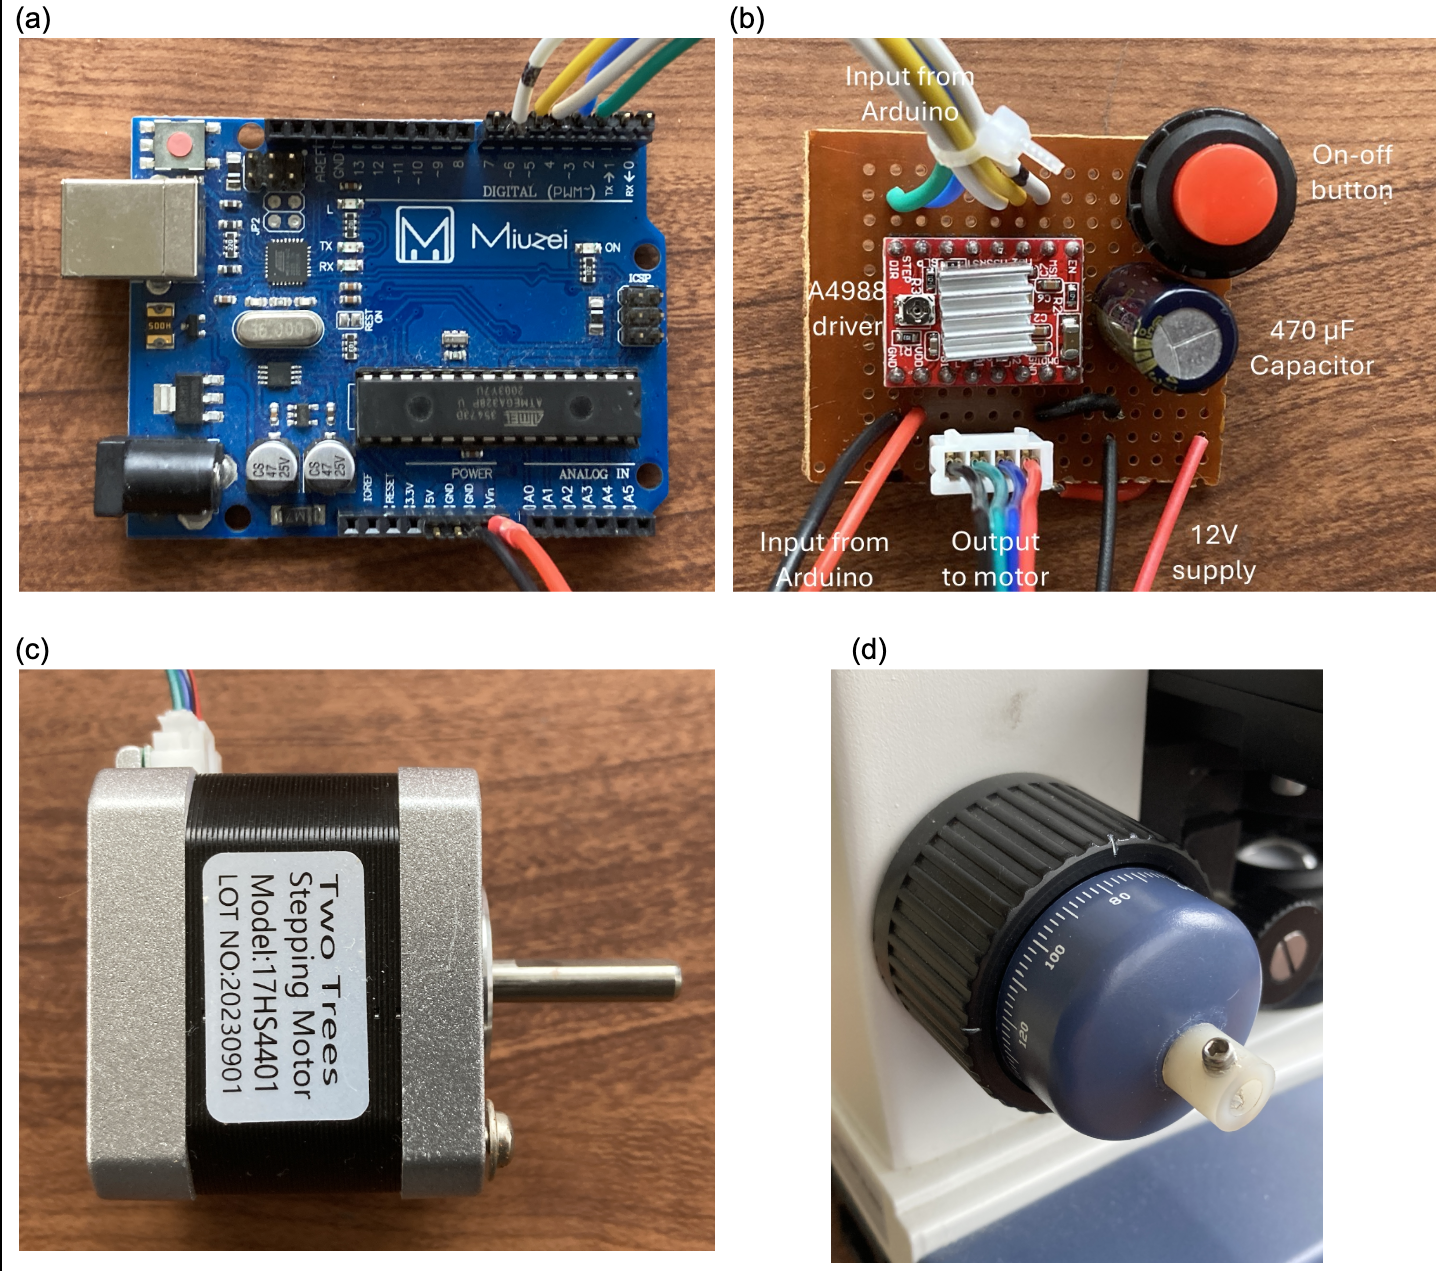
Figure 3. Components for controlling microscope focus using a stepper motor. (a) Miuzei Arduino Uno R3 board. (b) The A4988 driver. (c) Two Trees Nema 17 stepper motor. (d) nylon bush for attaching motor shaft to focus knob.
Once a set of images have been captured by manual or stepper motor methods, the frames can be combined to give the focus-stacked image using several software programs. I normally use CombineZP, a free program that runs on Windows. The CombineZP software is easy to use: Select “New” and upload the individual frames in order of focus, then select “All Methods” and hit “Go” (Figure 4). The program uses several different algorithms to achieve the stacking and presents the final stacked image from each algorithm for comparison.
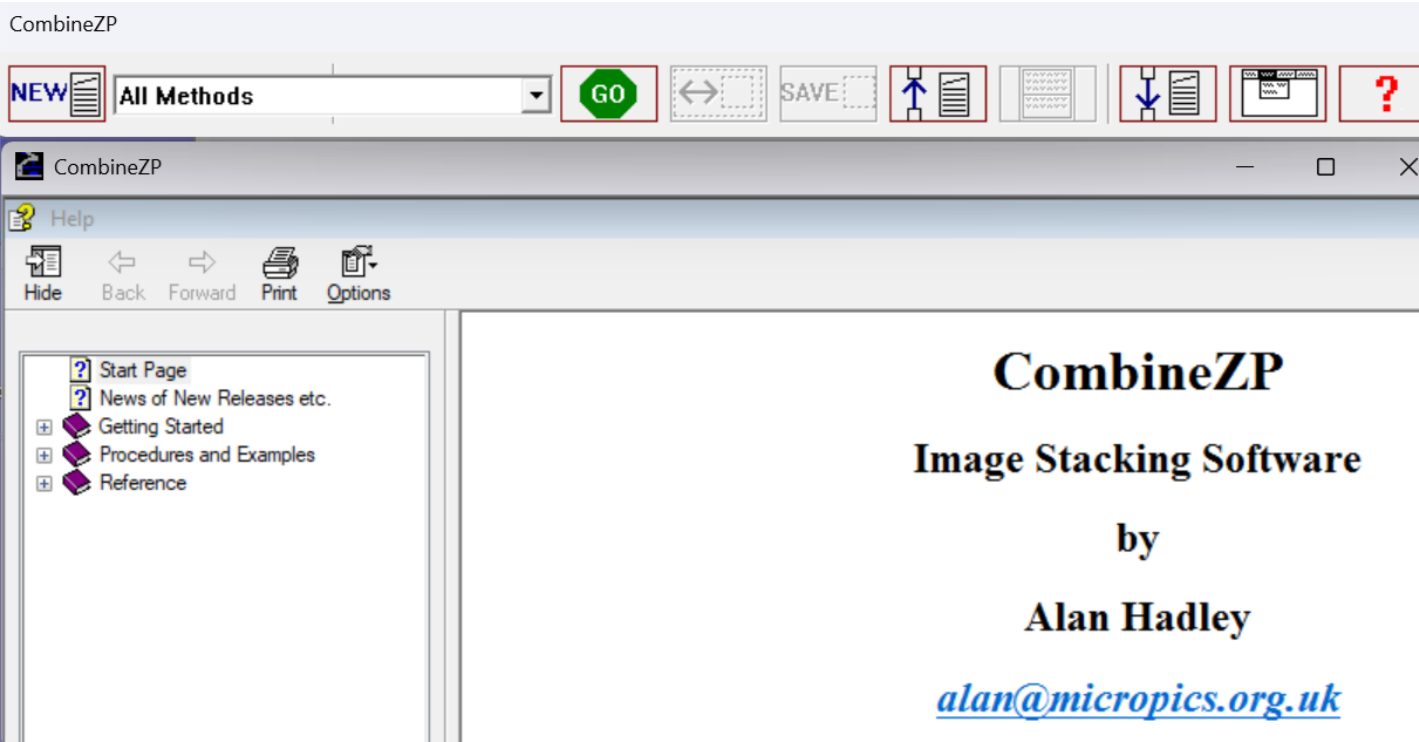
Figure 4. CombineZP software for image stacking.
An example of data acquisition using a stepper motor to control focusing and CombineZP (Pyramid do stack algorithm) to make a stacked image of the diatom Isthmia nervosa viewed under dark-field illumination is shown in Figure 5. The gold color is actually an artefact due to chromatic aberration from the edge of the dark-field patch stop in the condenser whose height was adjusted to emphasize the effect rather than to minimize it (artistic license!).
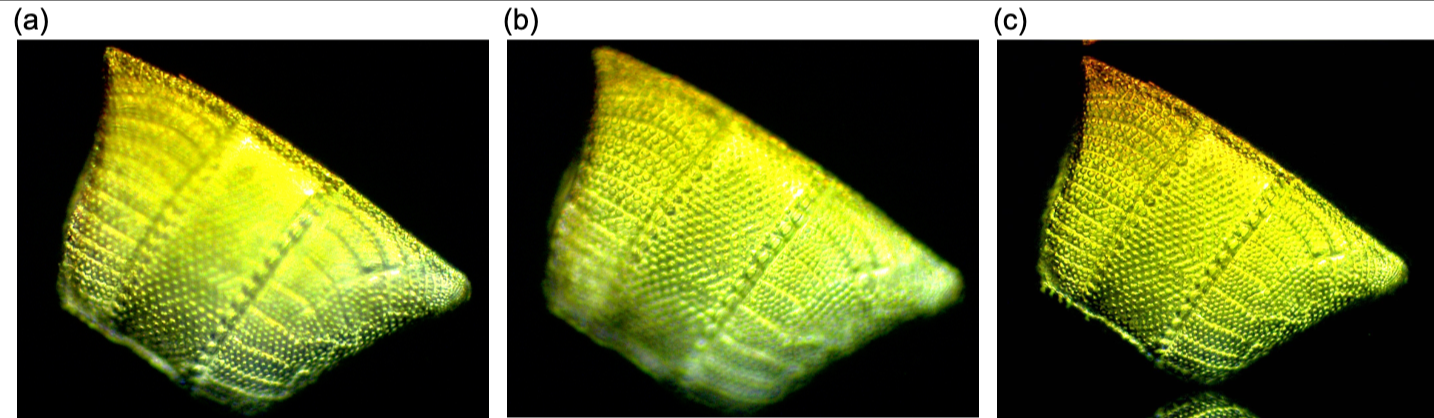
Figure 5. Dark field images of the diatom, Isthmia nervosa. (a) and (b) individual frames obtained at different levels of focus. (c) Focus-stacked image assembled from 20 individual frames using CombineZP.
Other free software for this purpose includes ImageJ, with the plugin Extended_Depth_Field.jar, where images taken at different levels are combined into a stack and then converted into a single image with a greater depth of field (Figure 6). This program has the advantage of being available for a PC or Mac.
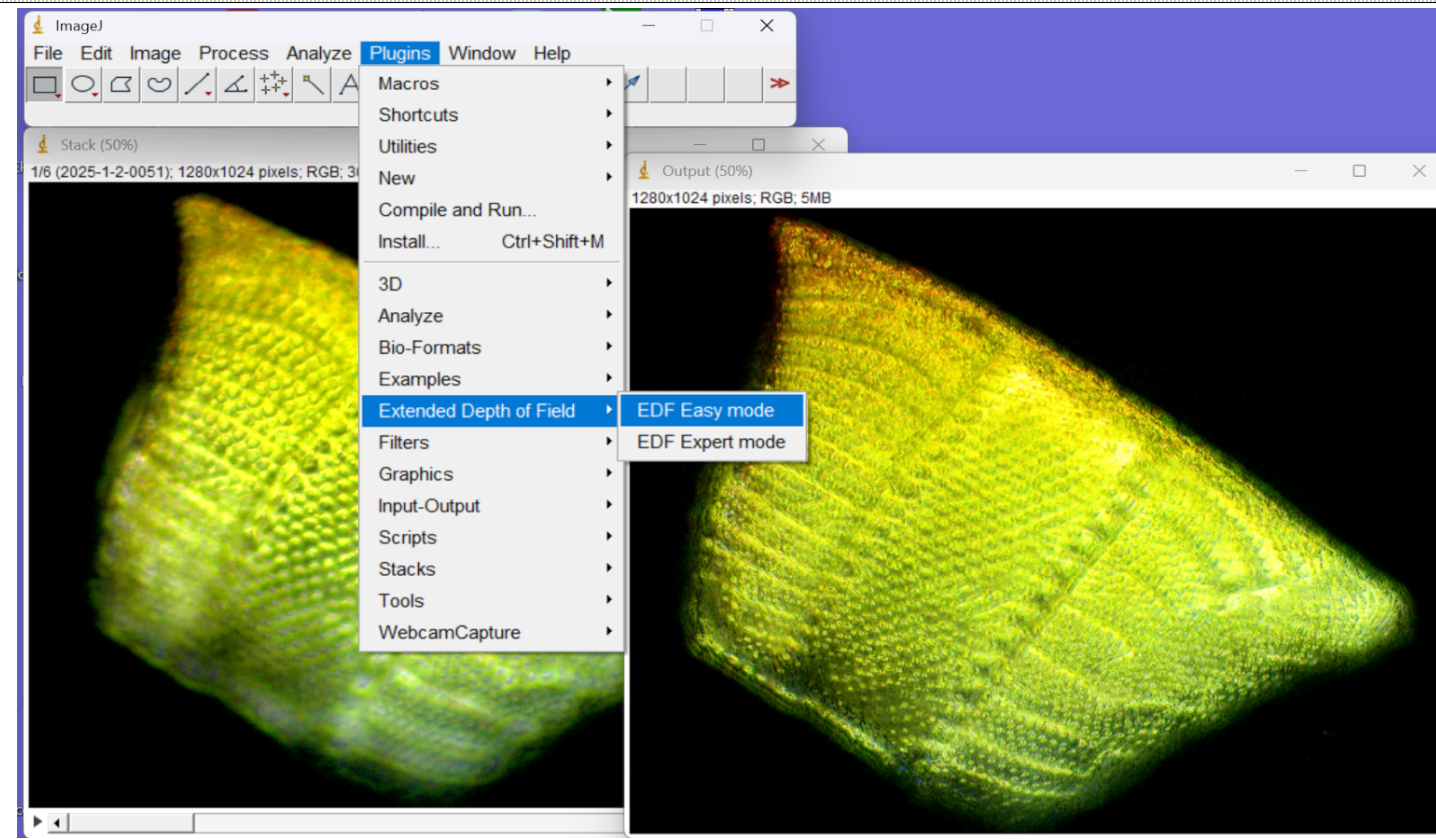
Figure 6. Focus-stacking using the ImageJ plug-in, Extended Depth of Field. Left image is an individual frame and the right is focus-stacked.
Commercially available focus-stacking software, such as Zerene and Helicon, offer more extended capabilities, particularly for macrophotography, which may involve large numbers of frames and challenging subjects containing fine detail. The tutorials associated with their websites provide both general and specific guidance.
